How to add an image to the back
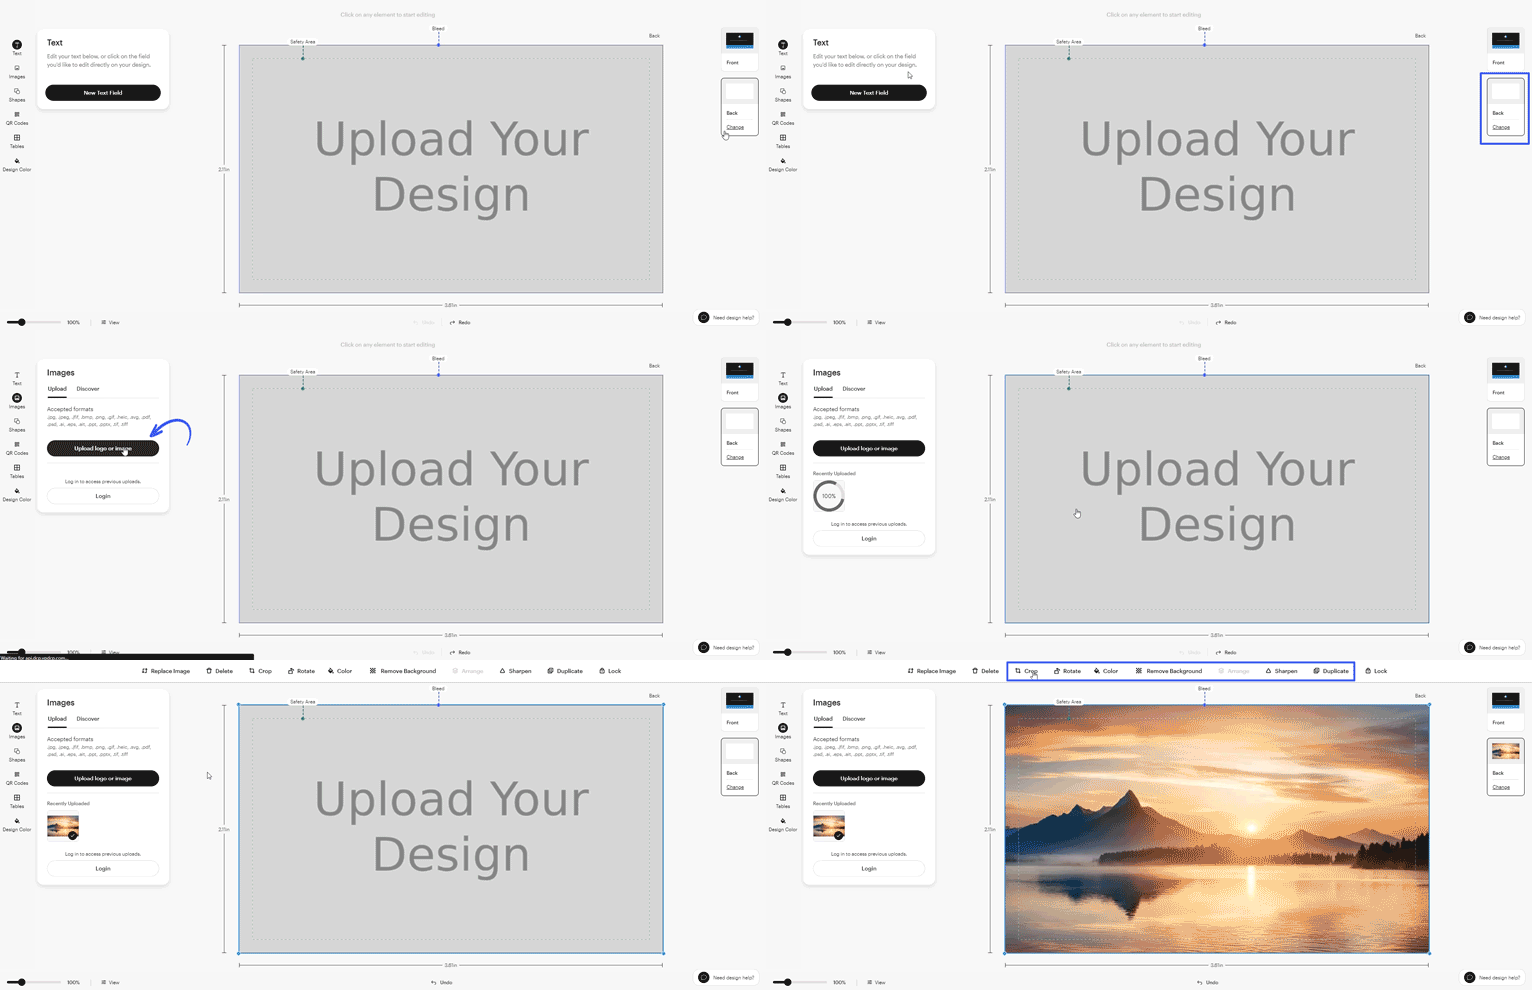
Open the back of your design
In the design studio, select Back on the right side of the screen.
Choose how to start the back
Select one of the following options:
Duplicate the front design: Copies everything from the front of your product to the back, so you can keep the same layout and style.
Start from blank design: Gives you an empty back so you can create a completely new layout from scratch.
Select a template: Lets you start with a pre-designed layout that you can customise with your own text and images.
Upload your image
Add an image using Upload your design. You can upload a new image, choose one from your saved uploads or drag and drop it directly into your design. Make sure you're signed in to access images you've uploaded before.
Edit and position the image
Select the image to resize, move or adjust it as needed.