Printed products are made on large sheets and then cut to their final size. Because this process happens quickly and in large batches, small variations can occur. The trim area exists to allow for these variations and marks where the final cut is made. Here are the key differences between full bleed and trim sizes:
Full bleed
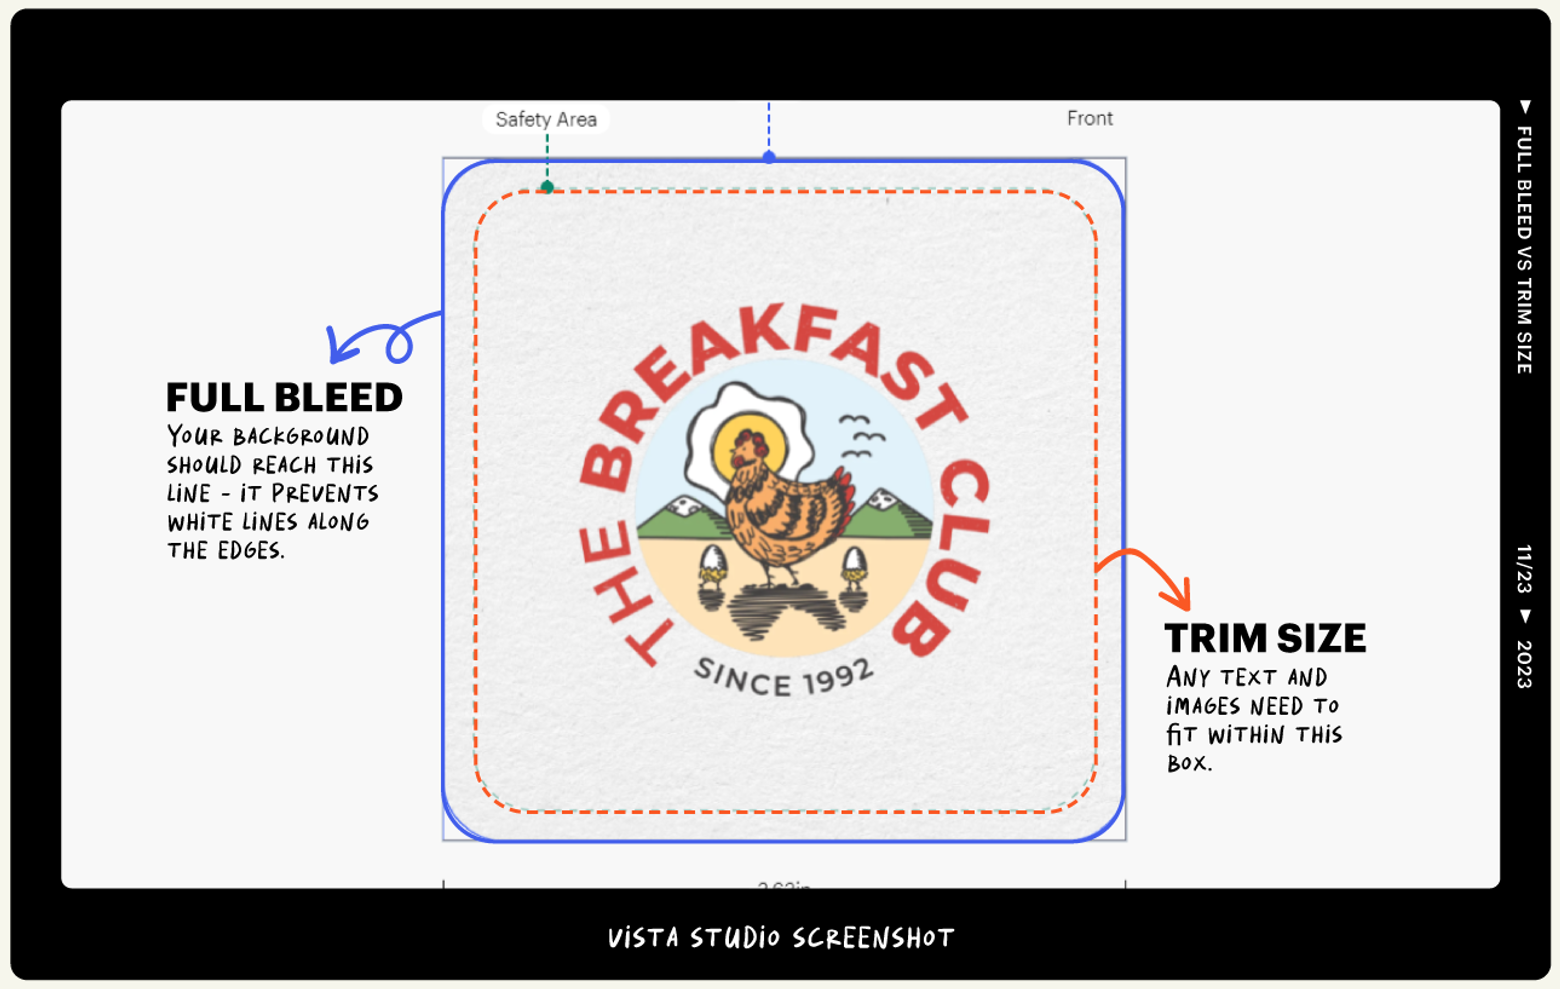
Full bleed is the area that extends beyond the final edge of your product. Anything in this area may be trimmed, but it helps ensure your design prints edge-to-edge without white borders.
Trim size
Trim size is the area of your artwork that will definitely appear on the final printed product and won’t be cut off. During trimming, the cut is made between the full bleed and the trim size.
In the design studio, the trim size is shown as a dashed line, about 3 mm from the edge.
Design tips for best results
When designing your product:
Keep all text, logos and important details inside the trim line
Extend background images and colours to the edge of the product at full bleed
Avoid placing important elements close to the trim edge
Following these guidelines helps prevent unwanted cropping and ensures consistent results.
Tips for using other design programs
Design programs (Illustrator, Corel Draw, Photoshop or Photo-Paint): Set up your design at the full-bleed size.
Layout programs (QuarkXPress or Adobe InDesign): Create your design at the trim size, then add the required bleed (for example, 3.5 mm). When exporting, include bleed settings so the final file prints edge-to-edge.