How do I add shapes to my design?
Last updated 16 June 2026.
Guide
You can add shapes and icons from the Graphics toolbar in the design studio. Once added, you can resize, move and customise them to fit your design.
1

Open Graphics

In the design studio, open the Graphics option in the toolbar to access shapes and icons. 
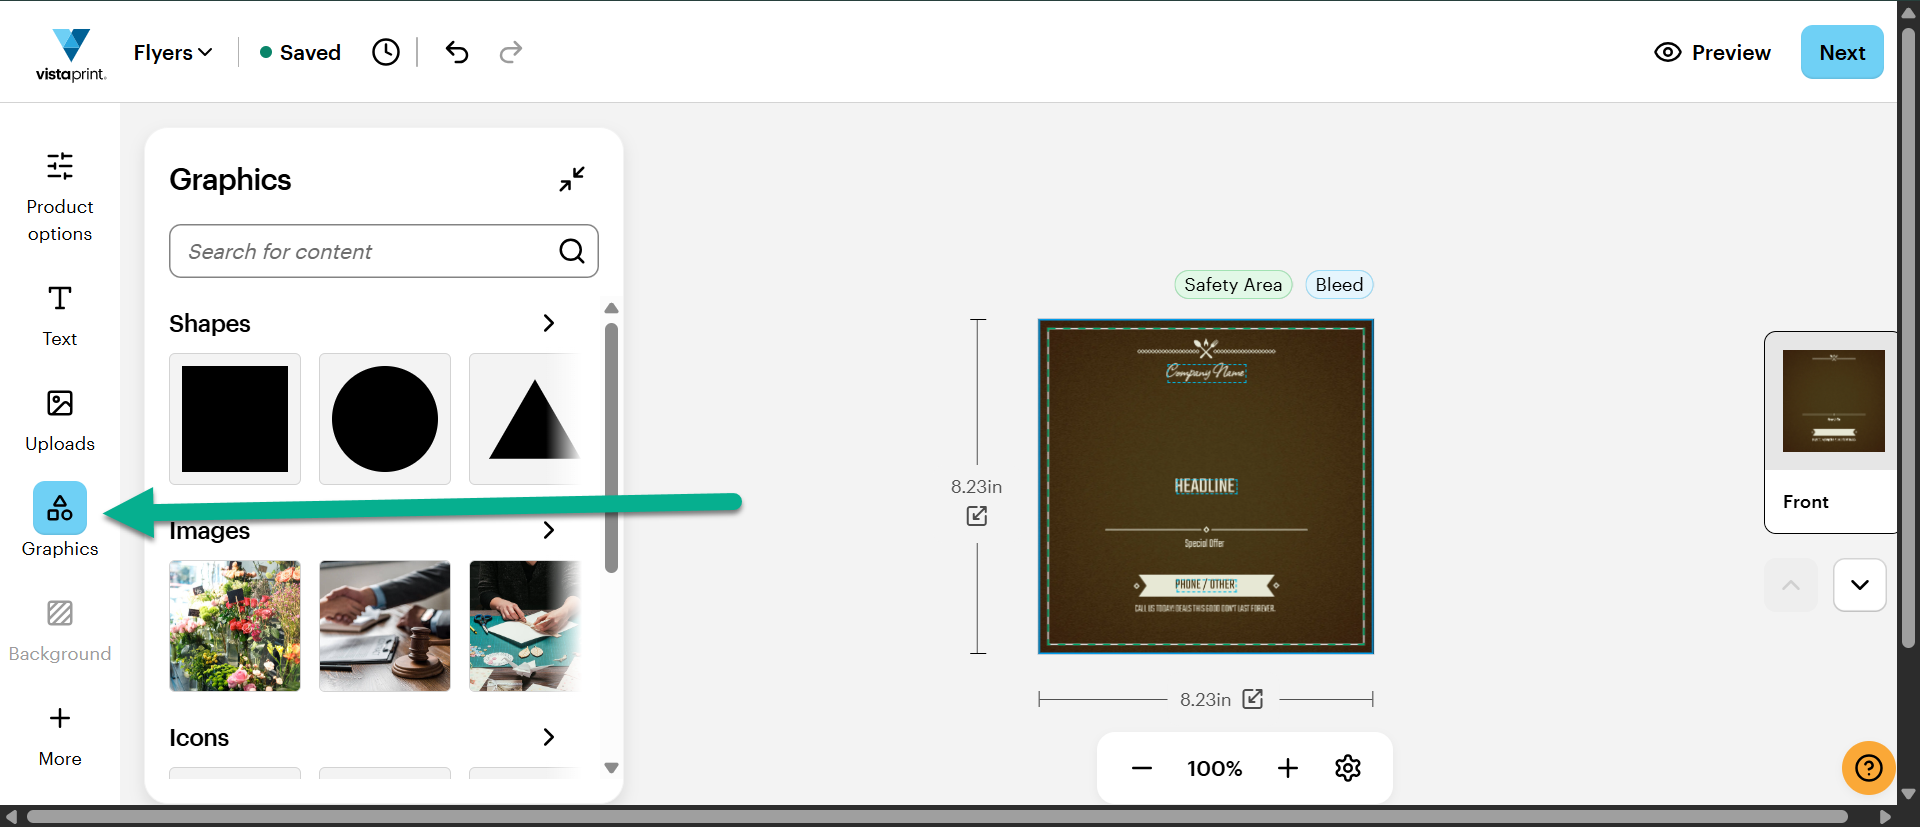
Select Graphics in the left sidebar to open the Graphics panel, which displays options for Shapes, Images and Icons.
2

Browse shapes and icons

Select Shapes to access the shapes gallery, or Icons to browse the icons gallery.
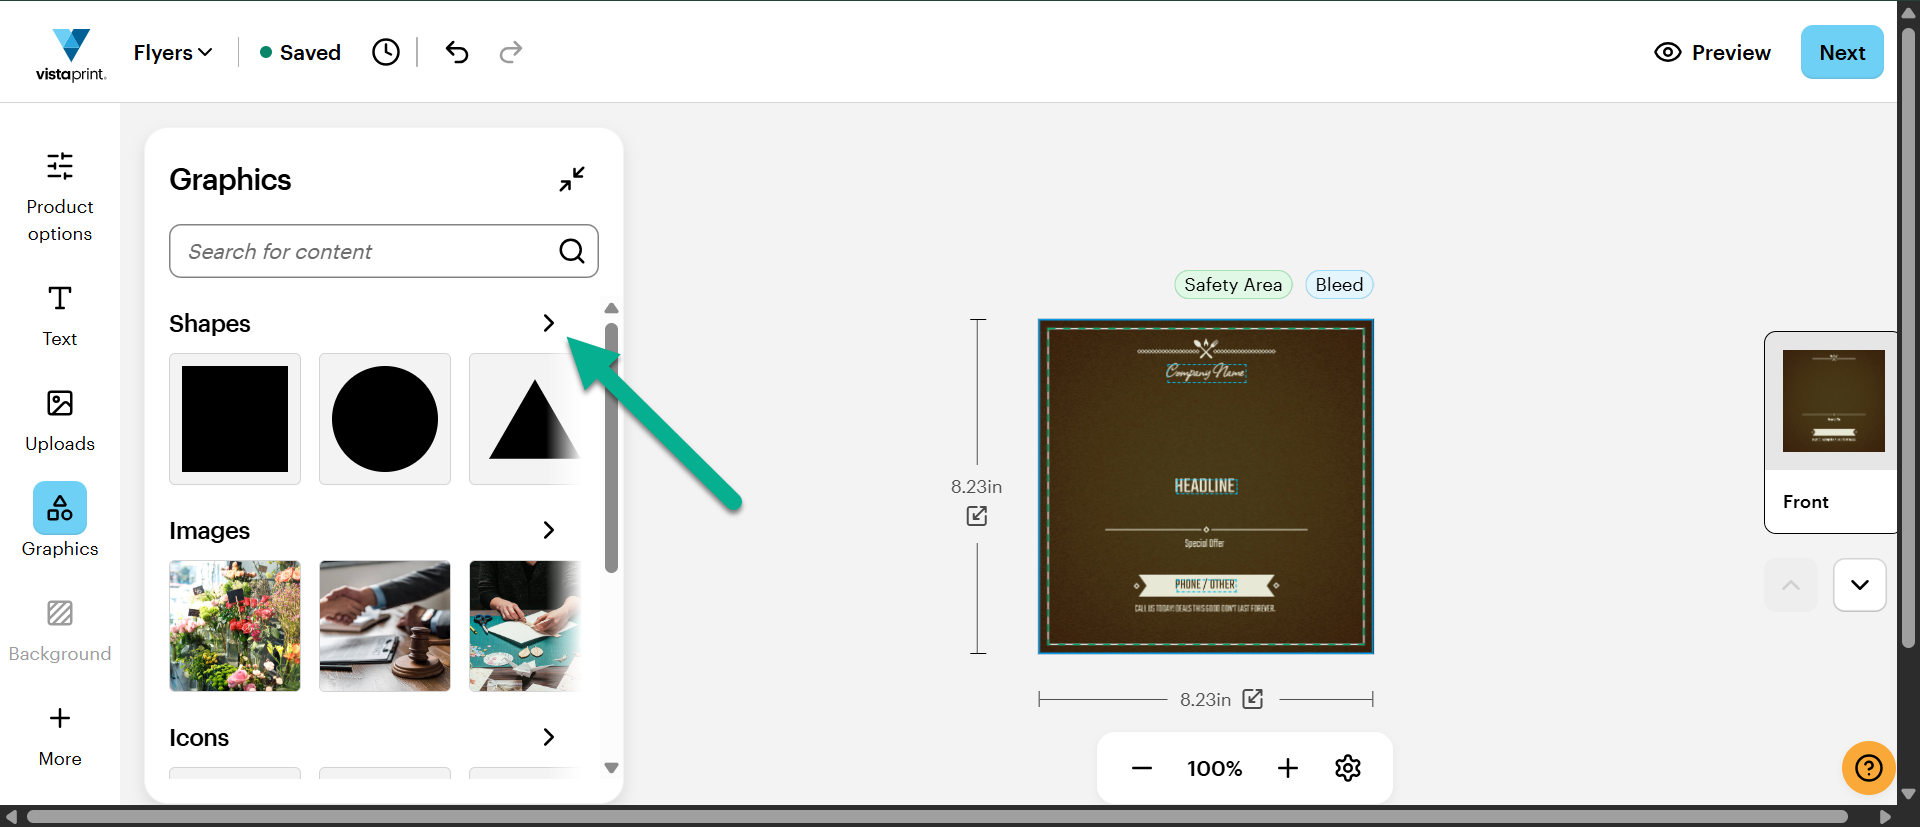
The arrow next to the Shapes category is highlighted, indicating the option to expand the full library of geometric elements.
3

Add it to your design

Choose a shape or icon to add it to your canvas. It'll appear in your design and can be moved or resized. 
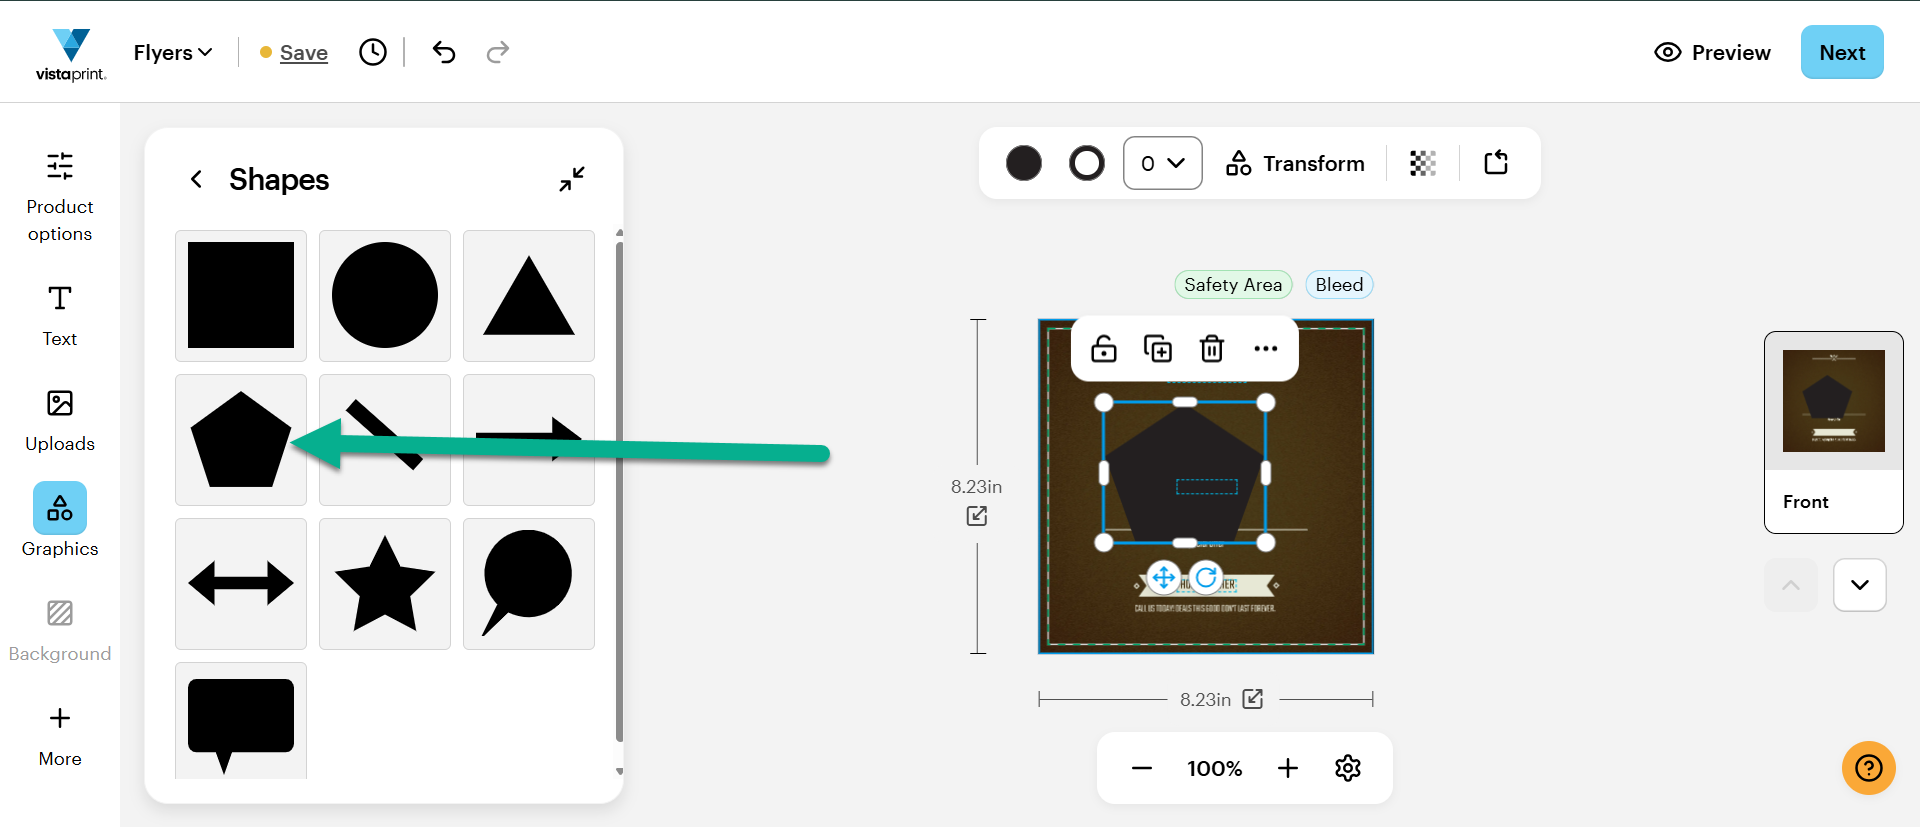
A pentagon shape is selected in the library and appears on the canvas with a blue bounding box and transformation tools.
4

Adjust the element

Select the shape or icon in your design to customise it using the toolbar options. 
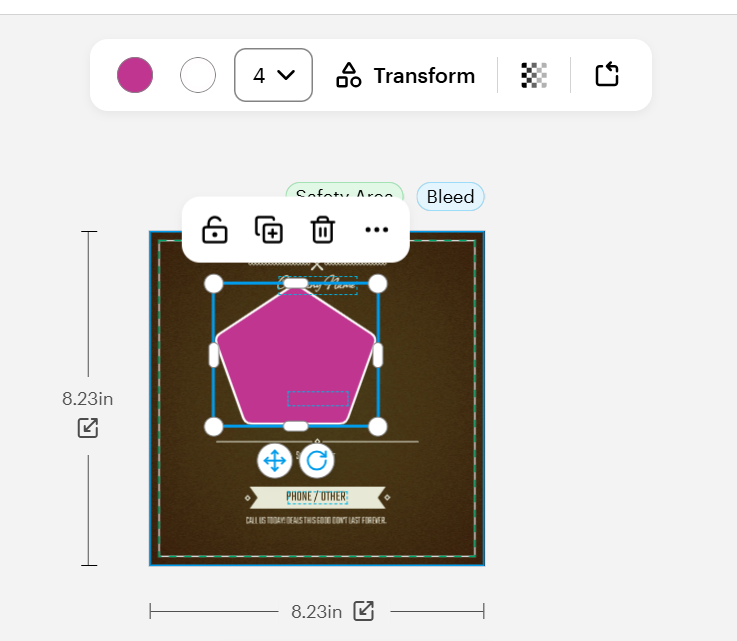
The pentagon on the canvas is filled with purple, featuring active transformation handles and a top toolbar for colour and border adjustments.

For example, for shapes you can:

  • Change the colour

  • Add a border

  • Change the colour and thickness of your border

  • Adjust the amount of sides the shape has

  • Adjust the opacity of the shape

  • Rotate the shape

For icons, you can:

  • Change the colour

  • Add a border

  • Crop the icon

  • Adjust the opacity of the icon

  • Rotate the icon


Was this article helpful?
Learn how we use your feedback

Connect live with Customer Support

Need help?

Contact Us