How do I change the font in my design?
Last updated 16 June 2026.
Guide
You can change the font in your design by selecting your text and choosing a new font from the font menu.

Steps to change the font

1

Select Text

Select the text field you want to adjust. This opens up the editing menu above. 
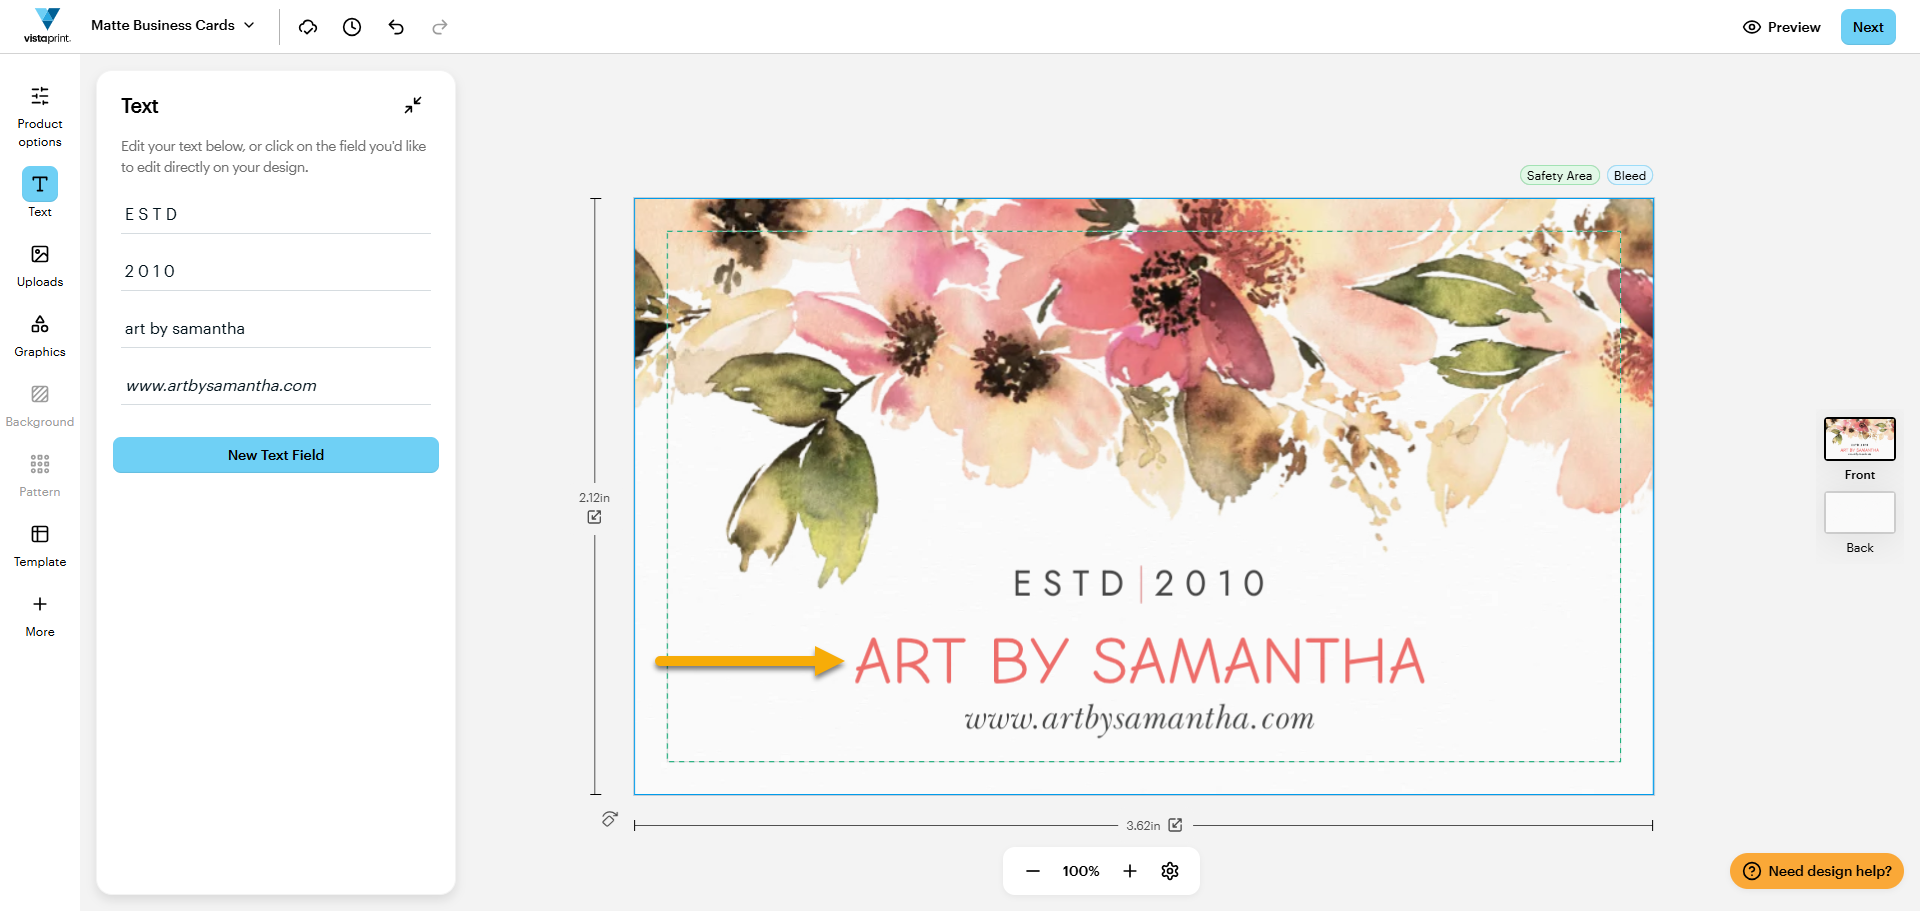
A design in the VistaPrint Studio with an arrow pointing to where to select the text field you want to adjust.
2

Open the font selection menu

You’ll find the font selection menu on the left. It shows the current font. 
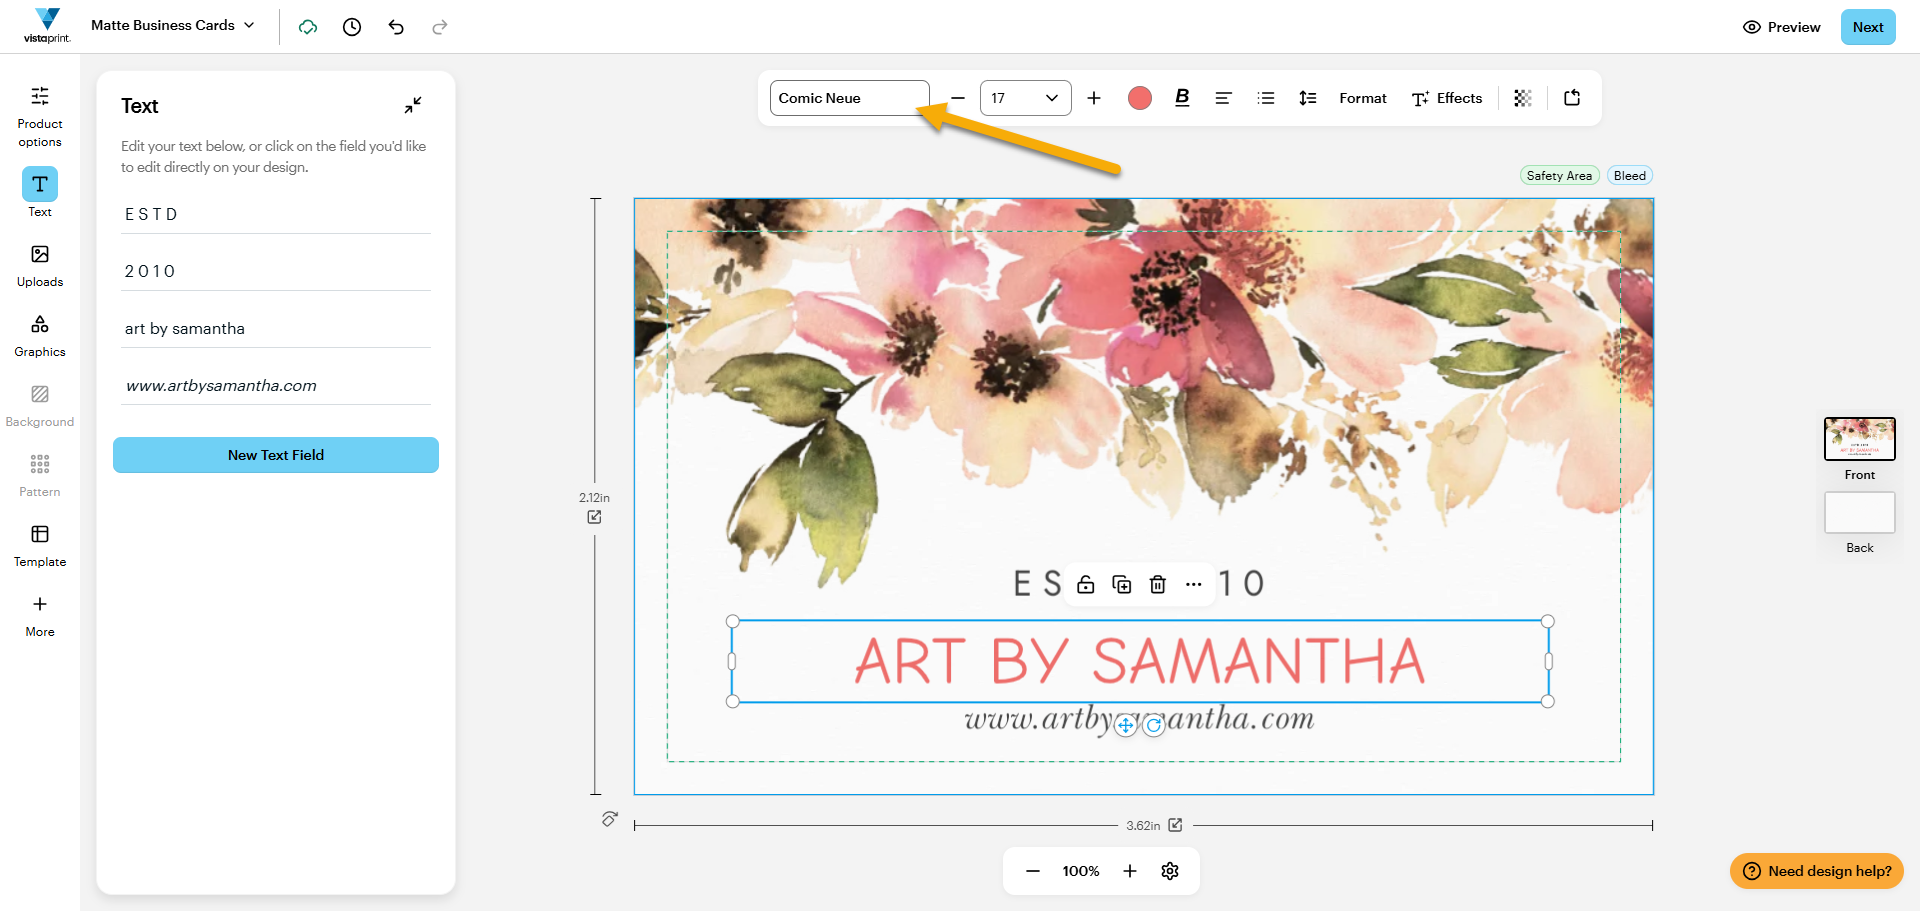
A design in the VistaPrint Studio with an arrow pointing to the font selection menu on the left of the editing tools on the top.
3

Find the font you want

Browse through the available fonts. You’ll find recently used fonts on top and if you use a Brand Kit, you’ll find those directly below Recent fonts.
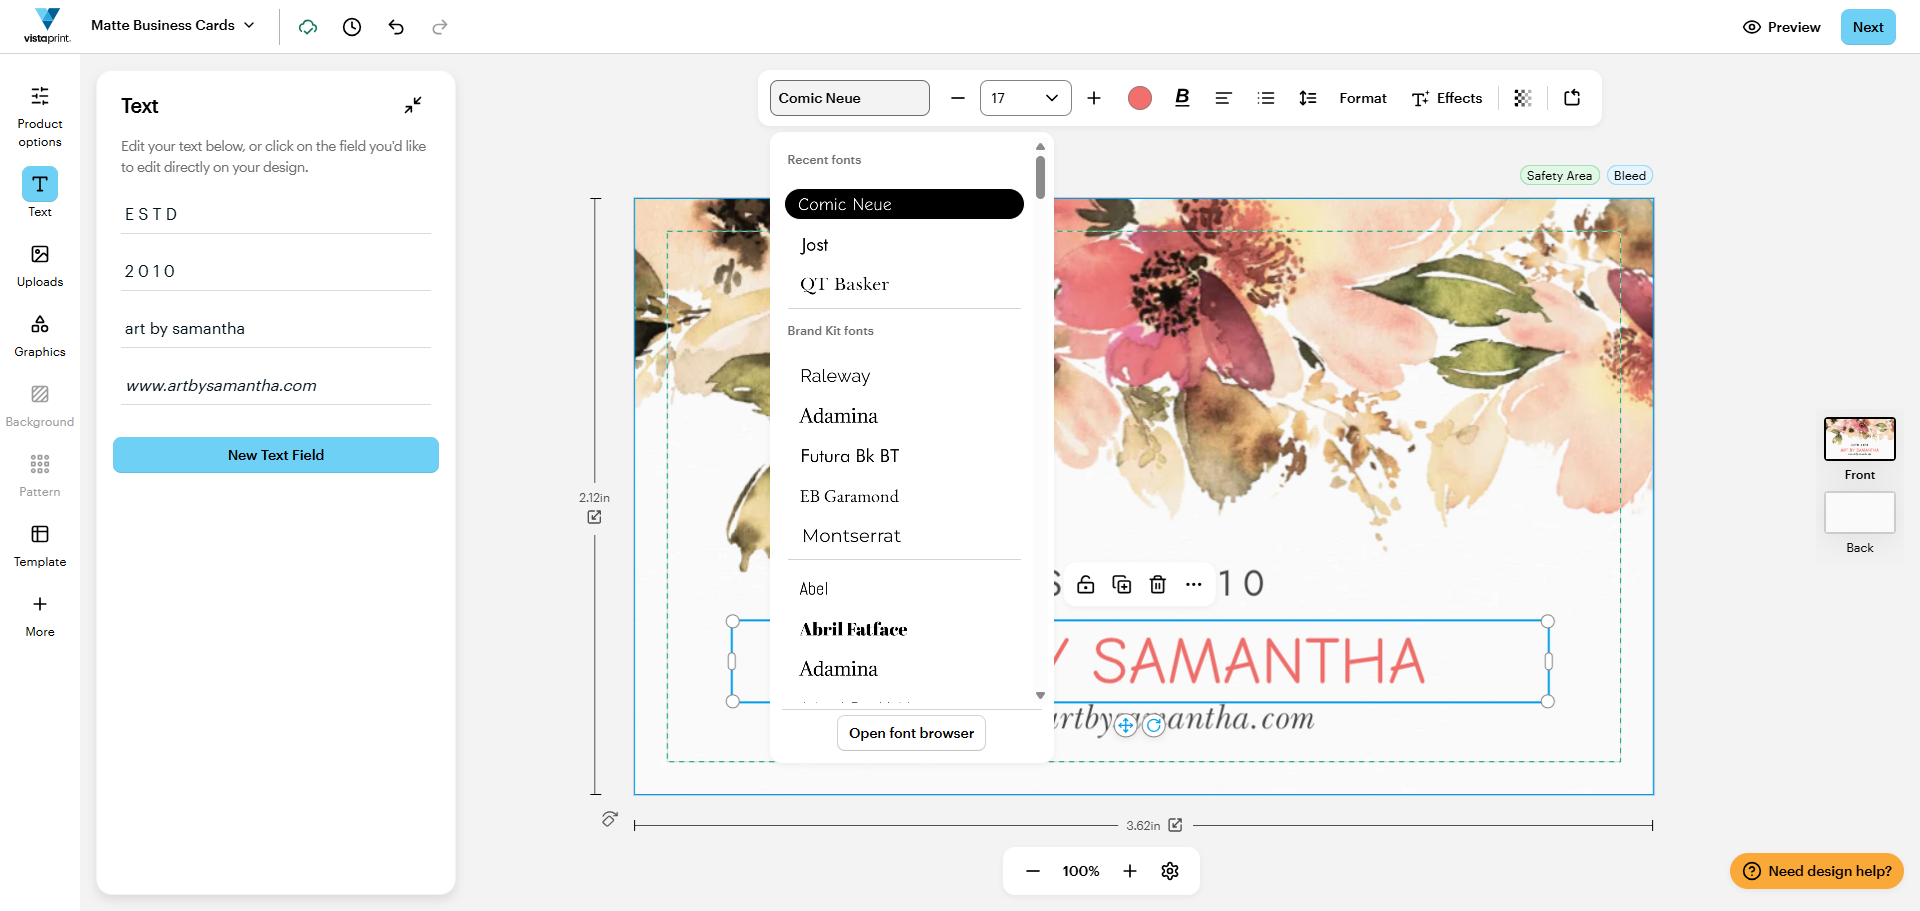
A design in the VistaPrint Design Studio with the font selection menu opened. Recently used fonts are on top. Brand Kit fonts follow below. All other fonts are at the bottom. You can navigate these.
4

Apply your font

Select the font to apply it directly to your text.
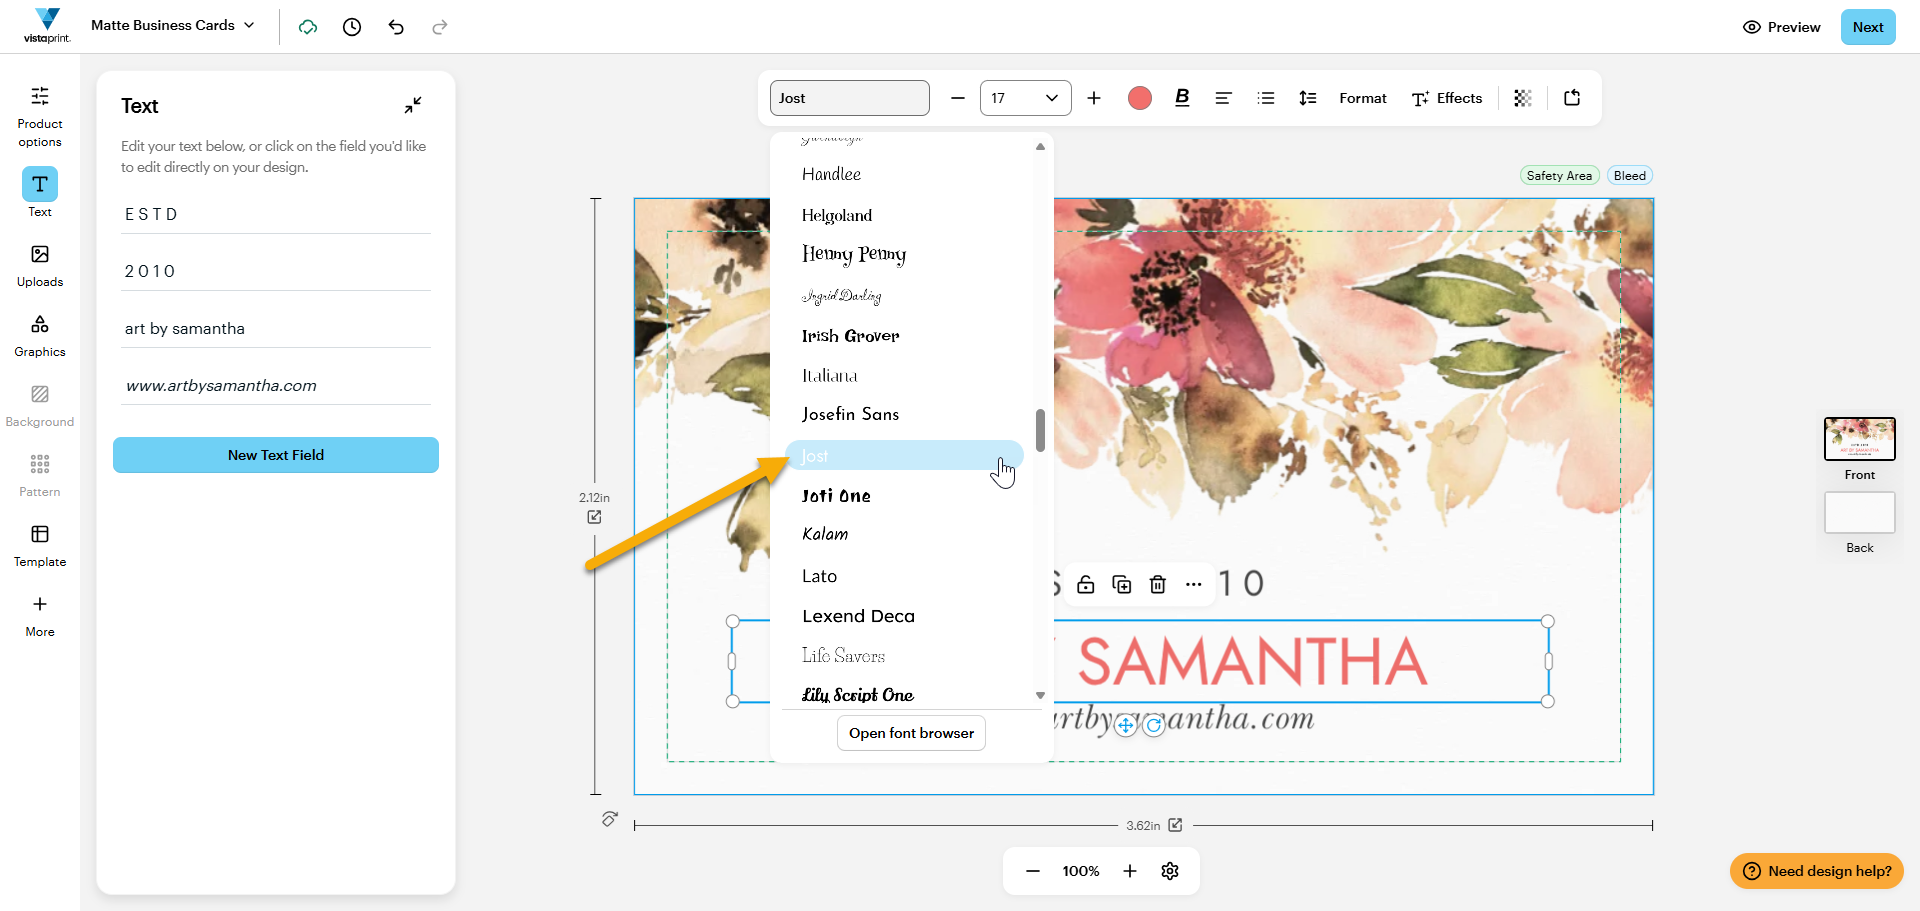
A design in the VistaPrint Studio where a new font is selected, Jost. The text is now in the new font.

Explore fonts by style 

Open the Font Browser to explore fonts by style, such as Traditional, Modern, Script, Playful or Decorative. This helps you narrow down options and find a font that matches your design faster. You can also select different variants, called weights, for each font.
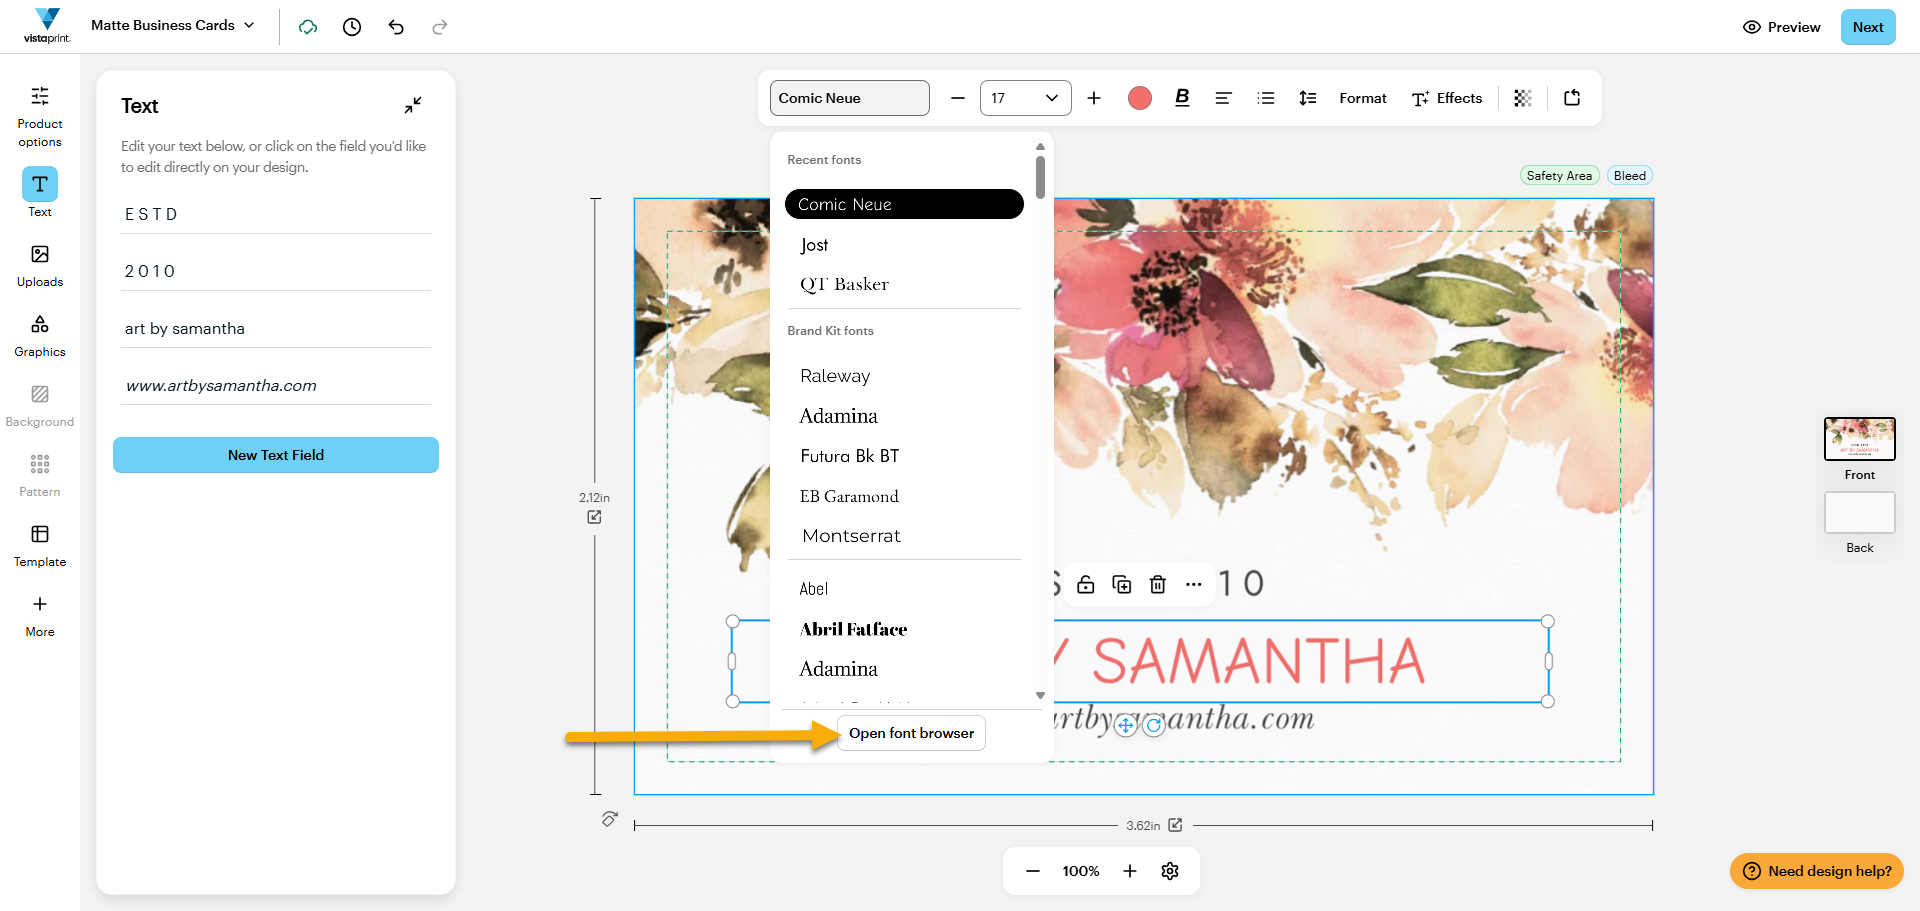
A design in the VistaPrint Studio with the font selection menu opened. An arrow points to the font browser at the bottom.

Need help choosing a font?

 Watch the video for tips on choosing the right font. 

Discover how to choose the perfect font for your logo by understanding brand personality, exploring different font families and learning how to combine styles for a professional look.

Was this article helpful?
Learn how we use your feedback

Connect live with Customer Support

Need help?

Contact Us